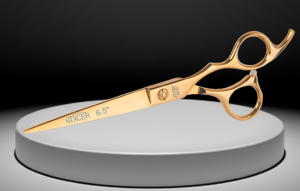
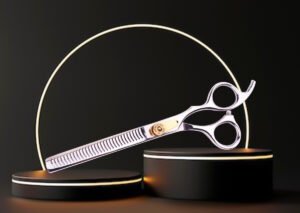
Fringes, also known as bangs, are a defining feature of many hairstyles, adding personality and style to a haircut. Whether you’re aiming for a blunt fringe, curtain bangs, or choppy ends, having the right hair cutting scissors for fringes is crucial. These specialized tools ensure precision and finesse, allowing you to achieve the perfect fringe with clean lines and a polished look. This guide explores the best hair cutting scissors for fringes and how to choose the ideal ones for your needs.
Understanding the Importance of the Right Scissors for Fringes
Fringes require a high level of precision and control. Unlike other parts of the haircut, fringes are highly visible and often frame the face, making their accuracy crucial. The right scissors can make a significant difference in achieving the desired look, whether it’s a sharp, defined fringe or a softer, more textured style. Key characteristics to consider when selecting hair cutting scissors for fringes include blade type, length, handle design, material, and tension adjustment.
Key Features of Hair Cutting Scissors for Fringes
1. Blade Type
Convex Edge Blades: These blades are known for their razor-sharp edge and smooth cutting action. They are ideal for creating clean, precise cuts needed for straight or blunt fringes. Convex edge blades provide a smooth, professional finish, making them a top choice for achieving a sharp and defined fringe.
Beveled Edge Blades: While not as sharp as convex blades, beveled edge blades offer versatility and durability. They are suitable for controlled cutting and can be used for creating textured or choppy fringes. These blades are also good for cutting through thicker hair sections.
2. Blade Length
5 to 6 Inches: Scissors with a blade length of 5 to 6 inches are generally recommended for cutting fringes. This length provides a balance between control and efficiency, allowing for detailed work while also making it easier to handle larger sections of hair. The right blade length ensures that you can achieve both precision and speed in your cutting.
3. Handle Design
Offset Handle: An offset handle design helps reduce strain on the hand and wrist, offering better ergonomics and comfort during prolonged use. This design allows for a more natural hand position, which is beneficial when cutting fringes with precision.
Crane Handle: A crane handle provides an even more relaxed hand position, enhancing comfort and control. This design is particularly useful for achieving intricate details and precise cuts, such as those needed for finely shaped fringes.
4. Material
High-Quality Stainless Steel or Japanese Steel: Scissors made from high-quality stainless steel or Japanese steel are preferred for their durability and sharpness. These materials ensure smooth cutting action and maintain the precision required for achieving well-defined fringes. Quality steel also contributes to the longevity of the scissors, making them a worthwhile investment.
5. Tension Adjustment
Adjustable Tension Systems: Scissors with adjustable tension systems allow you to customize the blade tension according to your cutting style. This feature ensures optimal performance and control, which is essential for achieving the desired fringe. Adjustable tension also helps in maintaining the sharpness and smooth operation of the scissors.
Techniques for Cutting Fringes
1. Preparation
Start with clean, dry hair to ensure accurate cutting. Wet hair can appear longer and may lead to uneven cuts once it dries. Clean hair also allows for better control and precision during the cutting process.
Divide the hair into manageable sections using clips. This helps maintain consistency and precision throughout the cutting process, making it easier to work on the fringe with accuracy.
2. Initial Cut
Use regular cutting shears to establish the basic length of the fringe. Determine the desired length and make an initial cut to create the foundation for further detailing. This step sets the groundwork for creating a well-defined fringe.
3. Creating the Fringe
For blunt fringes, hold a section of hair between your fingers and make a straight cut across the ends. This technique ensures a sharp, defined edge and is essential for achieving a bold fringe look.
To create a softer finish or choppy texture, use the tips of the scissors to make small, angled cuts into the ends of the fringe. This technique adds movement and dimension, providing a more textured appearance.
4. Refining the Fringe
Use the scissors-over-comb technique to refine and blend the fringe. Hold the comb parallel to the scalp and trim the hair that extends beyond the comb’s teeth. This method helps in achieving a smooth transition and blending the fringe with the rest of the hair.
To reduce bulk and blend the fringe with the surrounding hair, use thinning shears. These shears help create a seamless look and add texture, ensuring that the fringe integrates well with the overall hairstyle.
5. Final Touches
After completing the cut, check for any uneven sections or harsh lines. Use the appropriate shears to make final adjustments and ensure a polished look. Final touches help in achieving a professional finish.
For a precise finish, use a razor or trimmer to detail the edges and enhance the overall appearance of the fringe. This step ensures that the fringe is well-defined and complements the rest of the hairstyle.
Final Thoughts
Choosing the best hair cutting scissors for fringes involves considering features such as blade type, length, handle design, material, and tension adjustment. By selecting the right scissors and employing precise techniques, you can achieve well-defined, stylish fringes that enhance your clients’ looks. With the right tools and practice, you can master the art of cutting fringes and deliver stunning, professional results every time.


